Java中使用Redis(Jedis)

本文介绍如何在Java中通过Jedis使用Redis。

Jedis快速入门

官方地址(Github)

Java的maven项目中使用jedis

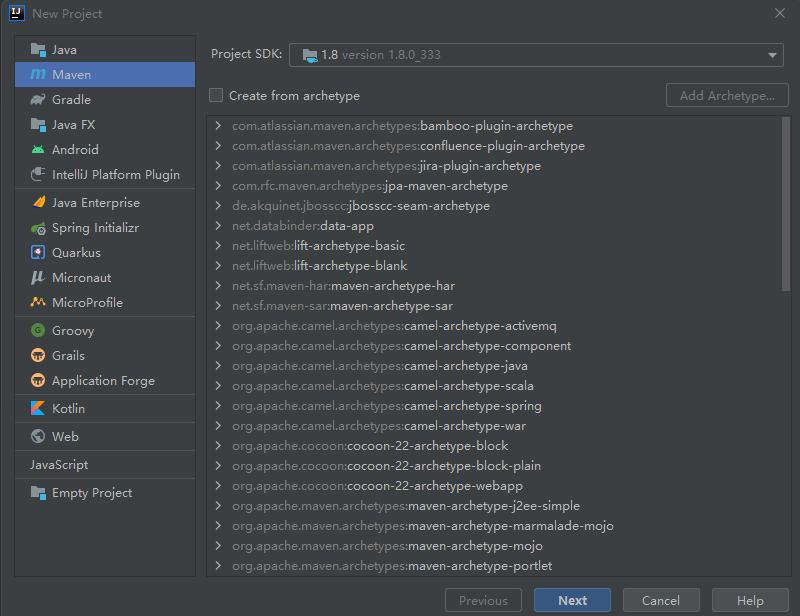
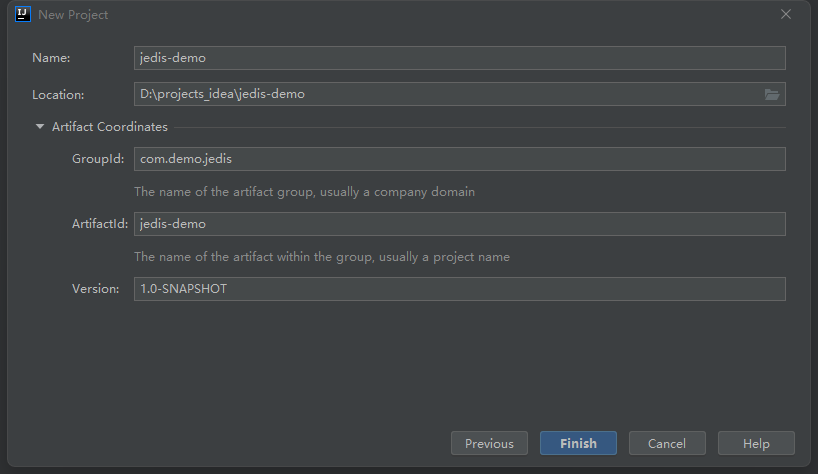
  • 使用IDEA创建maven项目

IDEA中创建maven项目1

IDEA中创建maven项目2

  • pom添加依赖

    1
    2
    3
    4
    5
    6
    7
    8
    9
    10
    11
    12
    13
    14
    <!--jedis-->
    <dependency>
    <groupId>redis.clients</groupId>
    <artifactId>jedis</artifactId>
    <version>4.3.0</version>
    </dependency>

    <!--junit-->
    <dependency>
    <groupId>org.junit.jupiter</groupId>
    <artifactId>junit-jupiter</artifactId>
    <version>5.7.0</version>
    <scope>test</scope>
    </dependency>
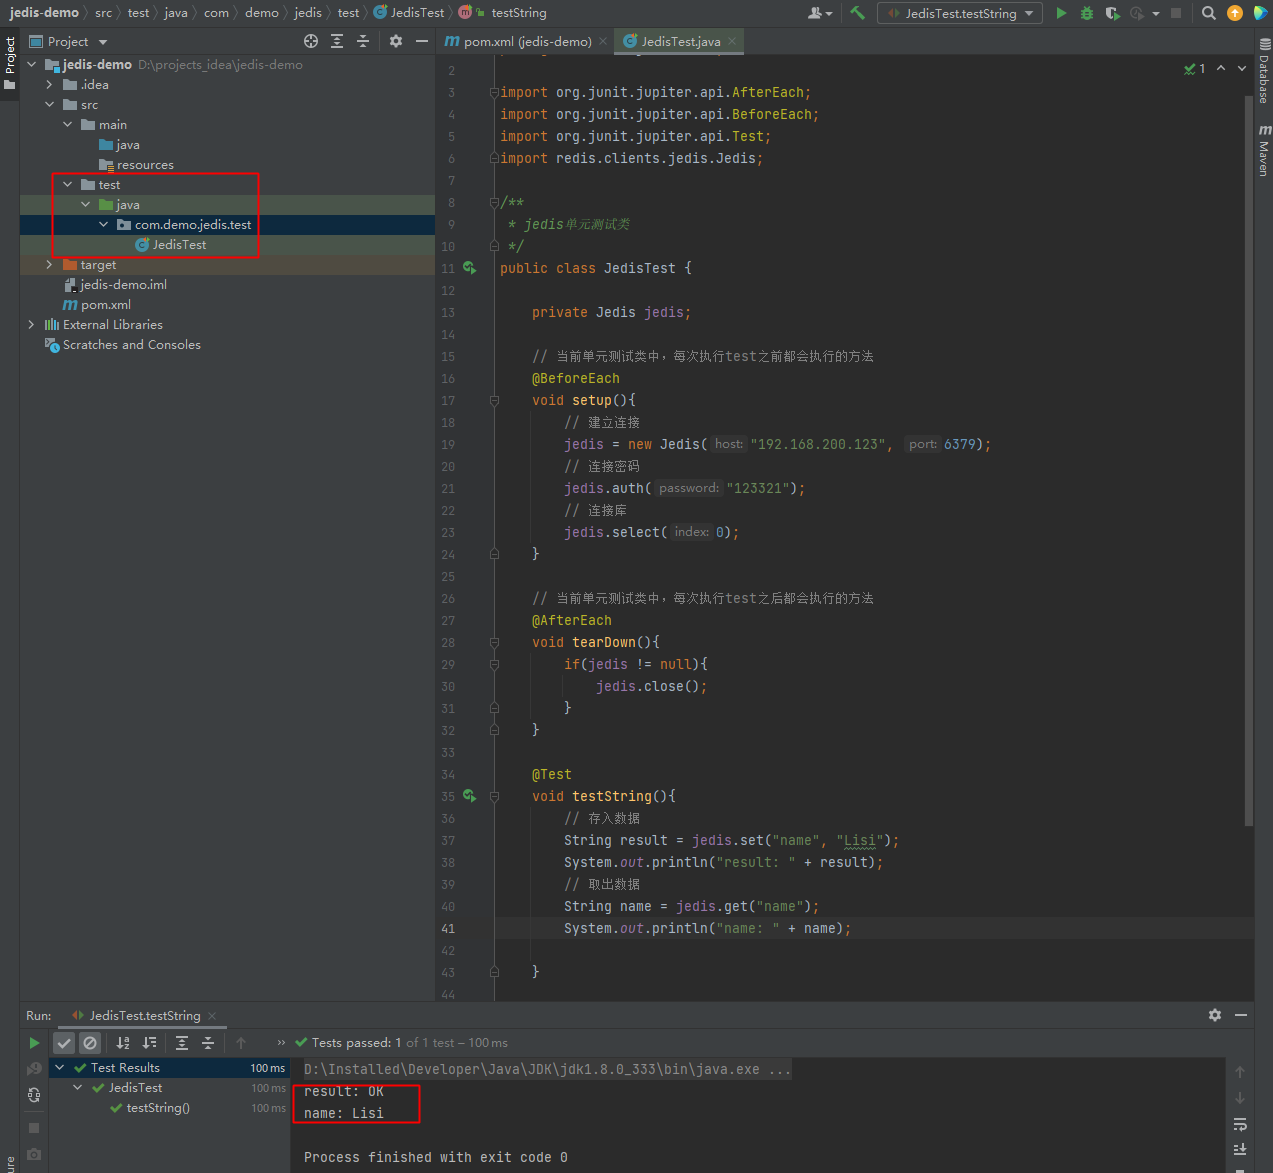
  • 新建测试类来测试jedis

    image-20221205235141484

    1
    2
    3
    4
    5
    6
    7
    8
    9
    10
    11
    12
    13
    14
    15
    16
    17
    18
    19
    20
    21
    22
    23
    24
    25
    26
    27
    28
    29
    30
    31
    32
    33
    34
    35
    36
    37
    38
    39
    40
    41
    42
    43
    44
    45
    46
    47
    48
    package com.demo.jedis.test;

    import org.junit.jupiter.api.AfterEach;
    import org.junit.jupiter.api.BeforeEach;
    import org.junit.jupiter.api.Test;
    import redis.clients.jedis.Jedis;

    /**
    * jedis单元测试类
    */
    public class JedisTest {

    private Jedis jedis;

    /**
    * 当前单元测试类中,每次执行test之前都会执行的方法
    */
    @BeforeEach
    void setup(){
    // 建立连接
    jedis = new Jedis("192.168.200.123", 6379);
    // 连接密码
    jedis.auth("123321");
    // 连接库
    jedis.select(0);
    }

    /**
    * 当前单元测试类中,每次执行test之后都会执行的方法
    */
    @AfterEach
    void tearDown(){
    if(jedis != null){
    jedis.close();
    }
    }

    @Test
    void testString(){
    // 存入数据
    String result = jedis.set("name", "Lisi");
    System.out.println("result: " + result);
    // 取出数据
    String name = jedis.get("name");
    System.out.println("name: " + name);
    }
    }

Jedis连接池

通过连接池获取redis连接(不用再通过new的方式创建连接)

1
2
3
4
5
6
7
8
9
10
11
12
13
14
15
16
17
18
19
20
21
22
23
24
25
26
27
28
29
30
31
32
33
34
35
36
import redis.clients.jedis.Jedis;
import redis.clients.jedis.JedisPool;
import redis.clients.jedis.JedisPoolConfig;

import java.time.Duration;

/**
* jedis连接池
*/
public class JedisConnectionFactory {

private static final JedisPool jedisPool;

static {
// 配置连接池
JedisPoolConfig poolConfig = new JedisPoolConfig();
// 最大连接数
poolConfig.setMaxTotal(8);
// 最大空闲连接
poolConfig.setMaxIdle(8);
// 最小空闲连接
poolConfig.setMinIdle(0);
// 等待时间
poolConfig.setMaxWait(Duration.ofSeconds(10));
// 创建连接池对象
jedisPool = new JedisPool(poolConfig, "192.168.200.123", 6379, 1000, "123321");
}

/**
* 获取redis连接
* @return
*/
public static Jedis getJedis(){
return jedisPool.getResource();
}
}

Springboot项目与redis

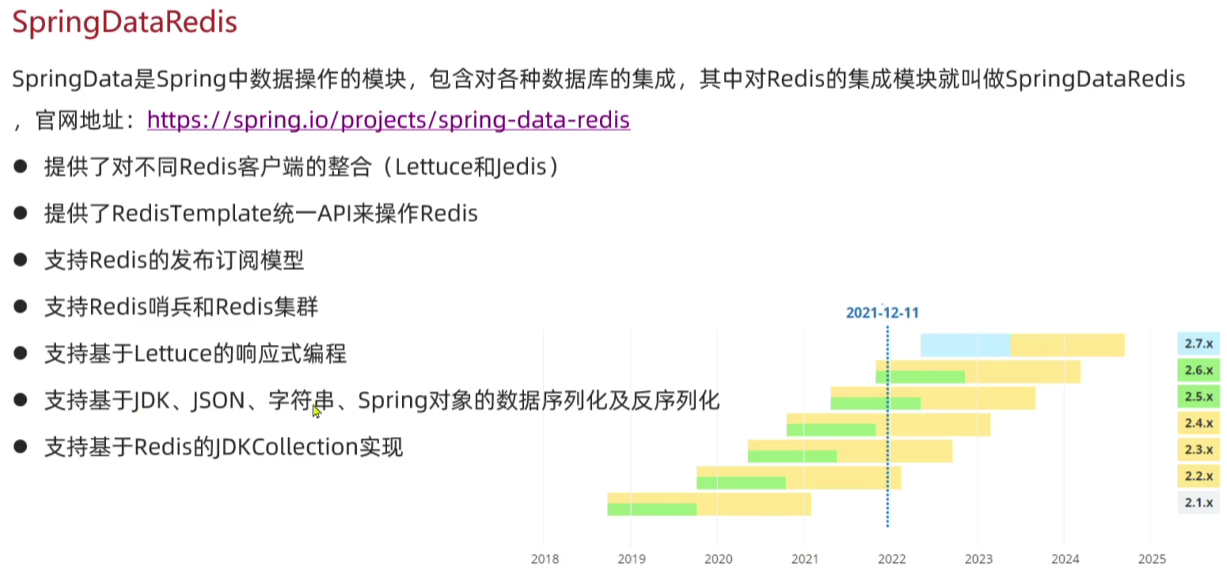
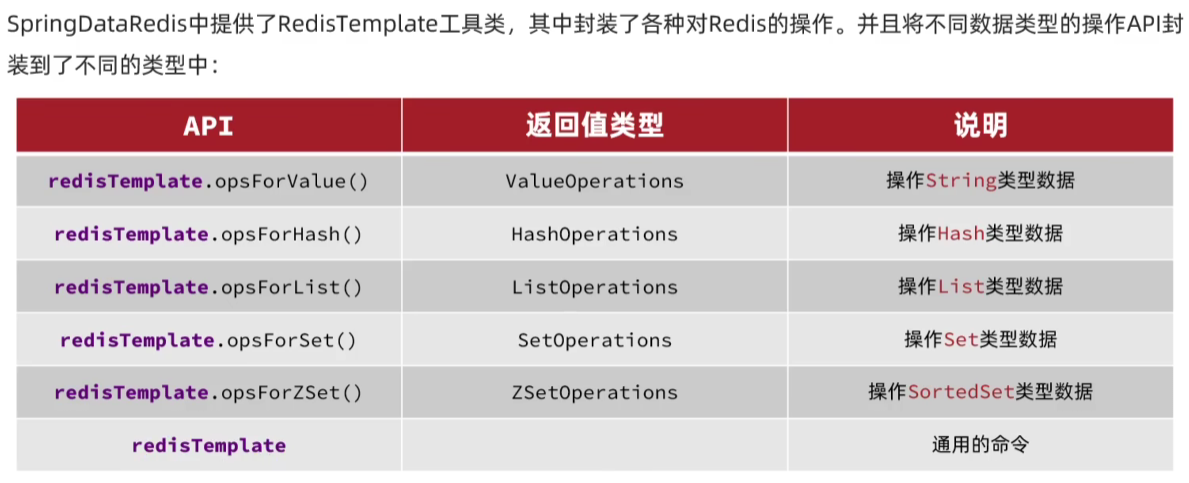
SpringDataRedis介绍

SpringDataRedis介绍

SpringDataRedis介绍2

Springboot项目中使用redis

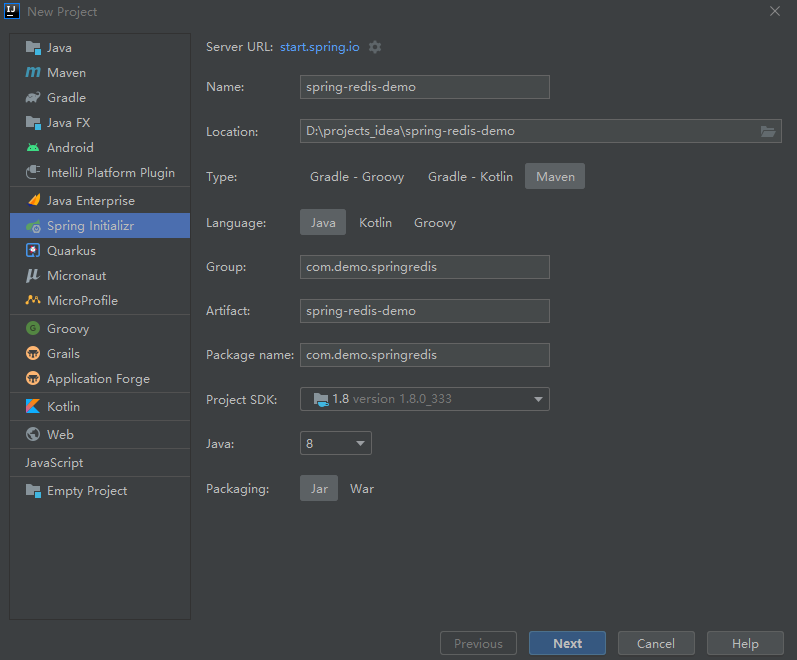
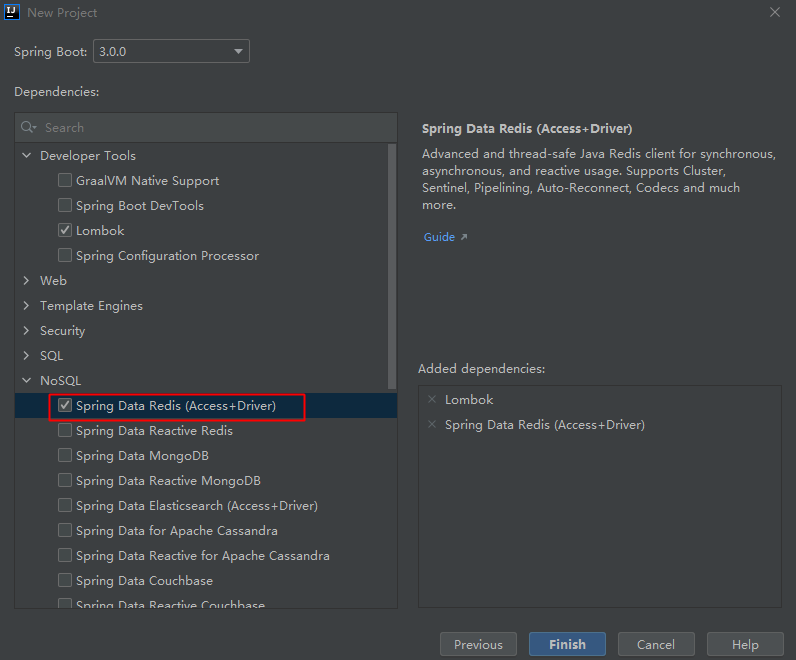
  • 创建Springboot项目

创建Springboot项目

创建Springboot项目2

  • 引入依赖

    1
    2
    3
    4
    5
    6
    7
    8
    9
    10
    <!--redis-->
    <dependency>
    <groupId>org.springframework.boot</groupId>
    <artifactId>spring-boot-starter-data-redis</artifactId>
    </dependency>
    <!--连接池依赖-->
    <dependency>
    <groupId>org.apache.commons</groupId>
    <artifactId>commons-pool2</artifactId>
    </dependency>
  • 修改配置文件

    [可选]:修改resources文件夹下的application.properties文件为application.yml
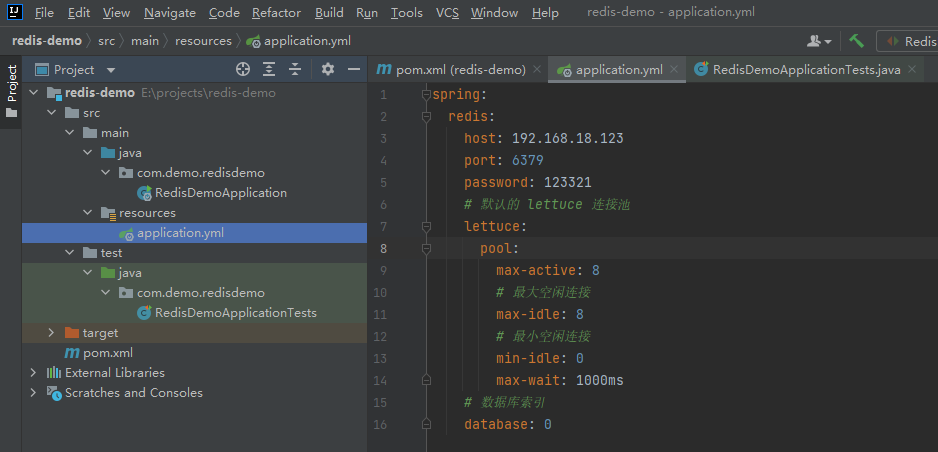
    修改配置文件

    yml 配置:

    1
    2
    3
    4
    5
    6
    7
    8
    9
    10
    11
    12
    13
    14
    15
    16
    spring:
    redis:
    host: 192.168.18.123
    port: 6379
    password: 123321
    # 默认的 lettuce 连接池
    lettuce:
    pool:
    max-active: 8
    # 最大空闲连接
    max-idle: 8
    # 最小空闲连接
    min-idle: 0
    max-wait: 1000ms
    # 数据库索引
    database: 0
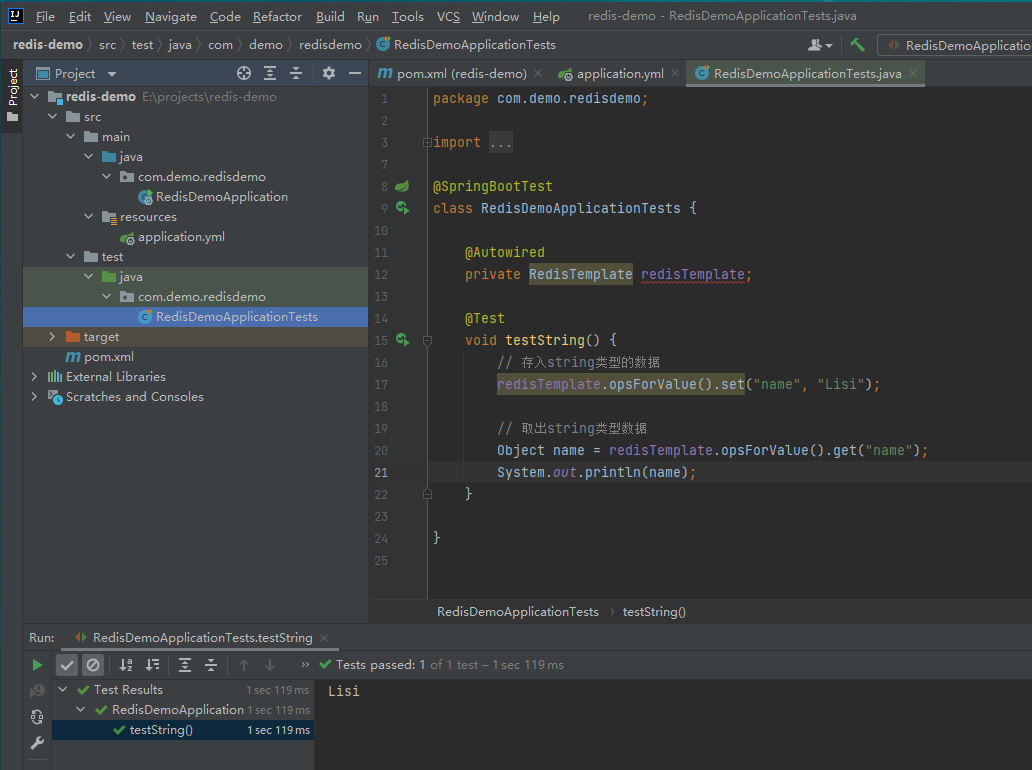
  • redisTemplate 操作redis

redisTemplate 操作redis

”乱码“问题

如果直接进行上方的操作,我们在redis数据库可以看到,产生了像乱码一样的东西

乱码问题

这是因为默认序列化器的问题,RedisTemplate加载时有初始化一个默认序列化器(JDK的序列化器):
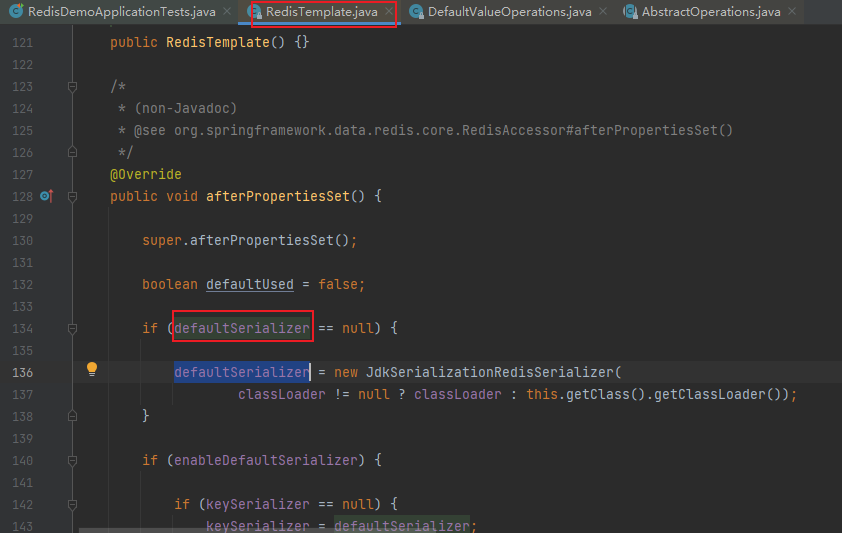
RedisTemplate默认序列化器加载

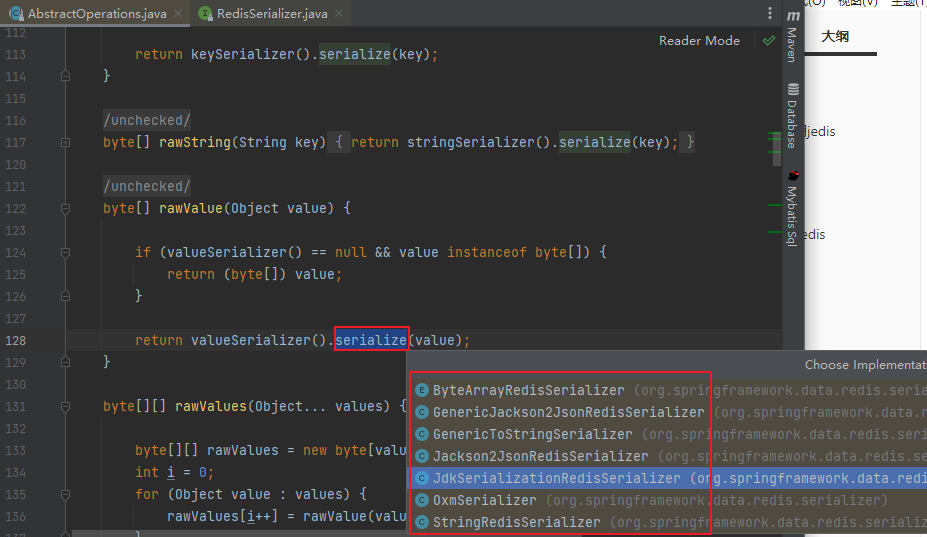
断点进redisTemplate.opsForValue().set()方法查看源码:
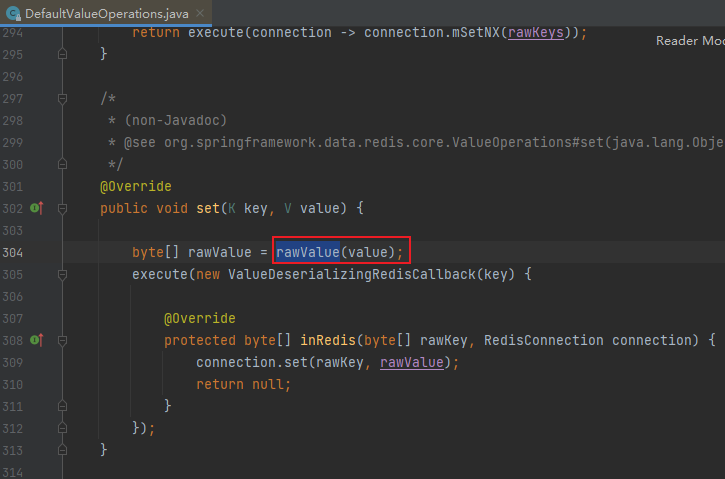
序列化源码1

查看rawValue(value)的实现源码:

序列化源码2

通过查看实现类可以看到,实现valueSerializer().serialize(value)的序列化器有好几个,如果没有初始化的话,默认就是用JdkSerializationRedisSerializer这个序列化器。

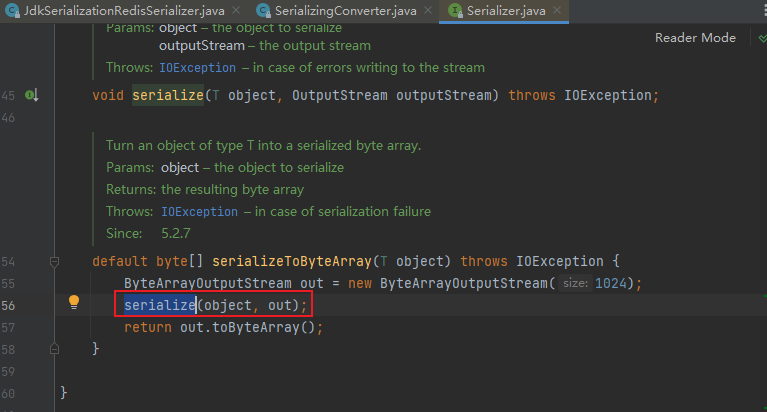
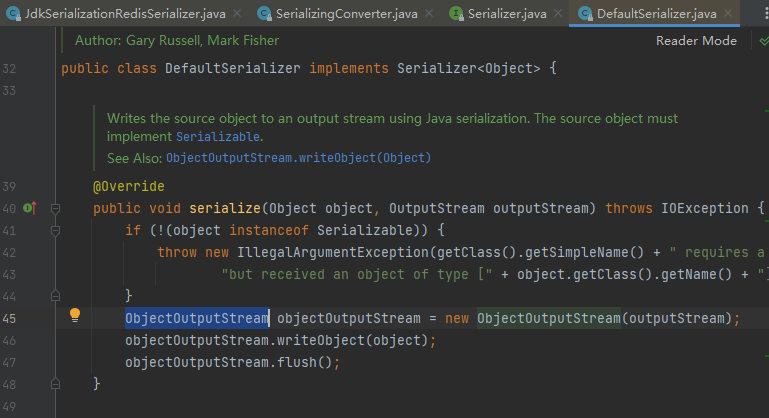
继续看JdkSerializationRedisSerializer 序列化器的实现:
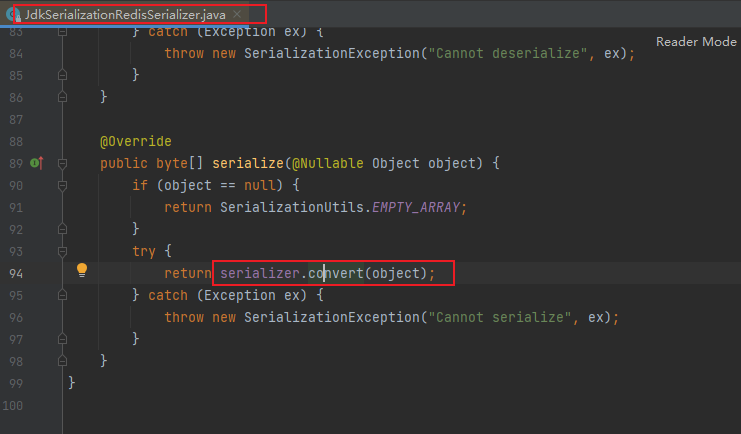
JdkSerializationRedisSerializer序列化实现

JdkSerializationRedisSerializer序列化实现2

JdkSerializationRedisSerializer序列化实现3

最终是通过ObjectOutputStream来序列化的。

解决方案:

自定义 RedisTemplate 配置:

1
2
3
4
5
6
7
8
9
10
11
12
13
14
15
16
17
18
19
20
21
22
23
24
25
26
27
28
29
30
31
32
33
package com.demo.redisdemo.config;

import org.springframework.context.annotation.Bean;
import org.springframework.context.annotation.Configuration;
import org.springframework.data.redis.cache.RedisCacheConfiguration;
import org.springframework.data.redis.cache.RedisCacheManager;
import org.springframework.data.redis.cache.RedisCacheWriter;
import org.springframework.data.redis.connection.RedisConnectionFactory;
import org.springframework.data.redis.core.RedisTemplate;
import org.springframework.data.redis.serializer.RedisSerializer;

import java.time.Duration;

@Configuration
public class RedisConfig {
@Bean
public RedisTemplate<String, Object> redisTemplate(RedisConnectionFactory factory) {
// 创建 RedisTemplate 对象
RedisTemplate<String, Object> template = new RedisTemplate<>();
// 设置连接工厂
template.setConnectionFactory(factory);
// 设置key序列化器
template.setKeySerializer(RedisSerializer.string());
template.setHashKeySerializer(RedisSerializer.json());
// 设置value序列化器
template.setValueSerializer(RedisSerializer.json());
template.setHashValueSerializer(RedisSerializer.json());

// 返回
return template;
}

}

如果有报错(jackson相关),需要添加 jackson 相关的包依赖,如果项目本身有依赖spring-mvc的话不会报错。

基本实现原理就是以上这样的,网上也可以查找相关:springboot redistemplate 配置,都大同小异。

数据对象存储问题

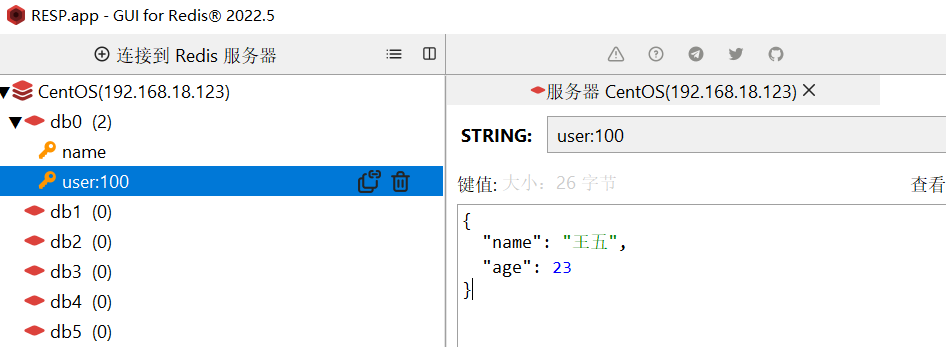
通过指定的序列化器序列化之后,我们可以看到,如果存储的是对象,redis中会写入类信息,这样就多占用了很大一部分存储空间:
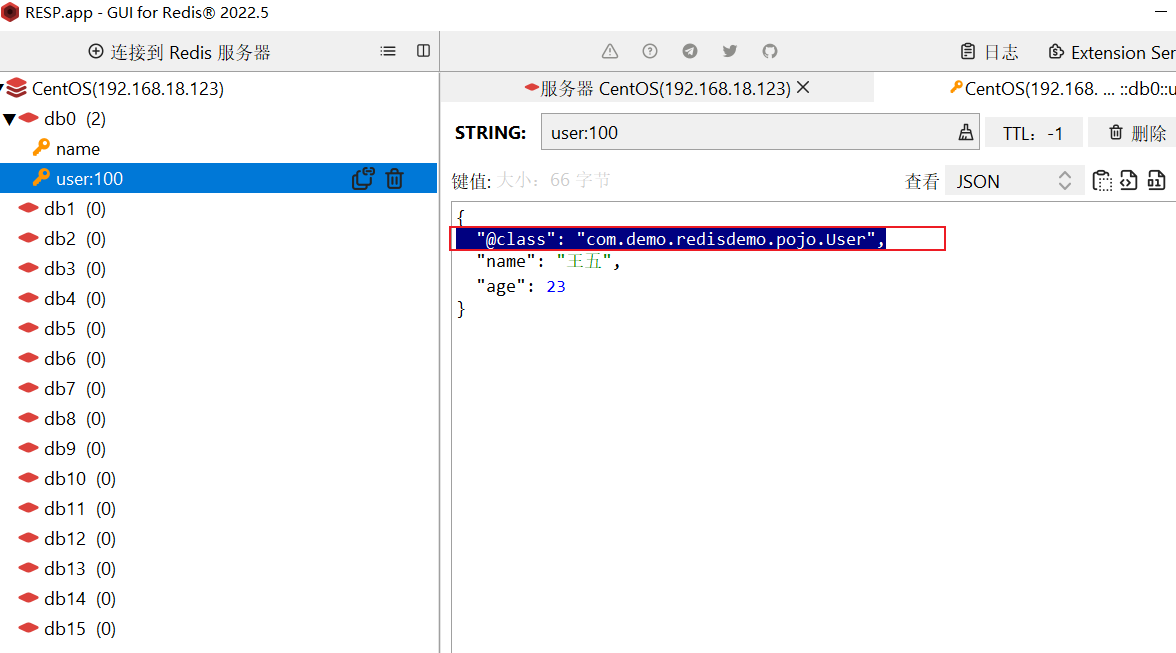
数据对象存储问题

解决方案1,使用StringRedisTemplate,并进行手动反序列化:

1
2
3
4
5
6
7
8
9
10
11
12
13
14
15
16
17
18
19
20
21
22
23
24
25
26
27
28
29
30
31
32
33
34
35
package com.demo.redisdemo;

import com.demo.redisdemo.pojo.User;
import com.fasterxml.jackson.core.JsonProcessingException;
import com.fasterxml.jackson.databind.ObjectMapper;
import org.junit.jupiter.api.Test;
import org.springframework.beans.factory.annotation.Autowired;
import org.springframework.boot.test.context.SpringBootTest;
import org.springframework.data.redis.core.StringRedisTemplate;

@SpringBootTest
class RedisTemplateTests {

@Autowired
private StringRedisTemplate stringRedisTemplate;
private ObjectMapper objectMapper = new ObjectMapper();

@Test
void testJson() throws JsonProcessingException {
// 创建对象
User user1 = new User("王五", 23);
// 手动序列化
String userStr1 = objectMapper.writeValueAsString(user1);
// 存入string类型的数据
stringRedisTemplate.opsForValue().set("user:100", userStr1);

// 取出string类型数据
String userStr2 = stringRedisTemplate.opsForValue().get("user:100");
// 手动反序列化
User user2 = objectMapper.readValue(userStr2, User.class);

System.out.println("user=" + user2);
}

}

手动序列化反序列化

RedisTemplate的两种序列化实践方案

方案一:

  1. 自定义RedisTemplate
  2. 修改RedisTemplate的序列化器为GenericJackson2JsonRedisSerializer

方案二:

  1. 使用StringRedisTemplate
  2. 写入Redis时,手动把对象序列化为JSON。
  3. 读取Redis时,手动把读取到的JSON数据反序列化为对象。

Java中使用Redis(Jedis)
https://binbiubiu.github.io/20221103130000/
作者
Binbiubiu
发布于
2022年11月3日